The modems included with your Solo Connect kit are pre-configured to work with the SIM included and your LiveU Solo.
However, sometimes you may find you need to debug, change or correct settings in the Wingle, so below is a guide to how to log into the user interface of the modem and do so.
These modems operate in a mode where they use DHCP to give your computer (or your LiveU Solo) a private IP address, different from the public IP address the SIM and the carrier network will give it. In addition, the modem itself has a web user interface where you can change the modem's settings.
You will need a laptop or computer with a USB port in order to perform these steps.
Step 1: Install the Modem Driver
Insert the stick and if using Windows, run the installer that is presented from the modem itself. If you are on MacOS, you need an updated version of the installer contained on the Wingle, so instead download it from: https://consumer.huawei.com/en/support/routers/e8372/ and install it.
Once installed, the Wingle will show up to your laptop or computer as an ethernet port. By default, it uses the private network 192.168.8.x, where the Wingle itself is 192.168.8.1. However, if LiveU has already configured this device, that may be changed to 192.168.10.x.
Step 2: Log Into the User Interface of the Modem
One you have the driver installed (and reboot if needed), and the device insert, you should be able to navigate to one of these two address in our web browser:
or, if LiveU has already configured this modem:
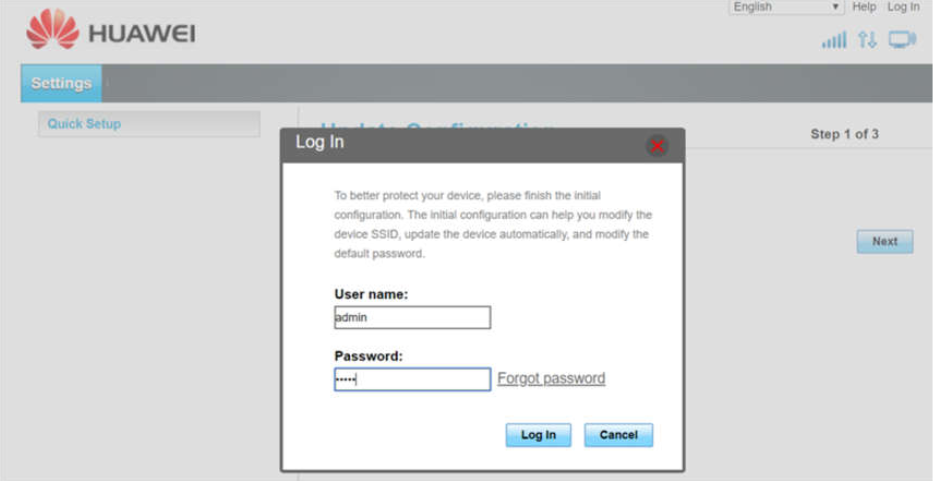
Either one of these should bring up the modem user interface web page:

To log into the web user interface, use the username and password admin (both the same). If this is the first time ever logging into the modem, it will ask you to change the password.
If LiveU has previously configured this modem, use the username "admin" and the password "liveu123" to login. If you prefer to change this password after logging in, you may.
Step 3: Configure the APN
If you need to check or change the APN used, go to the top menu Settings, then to Dial-Up.
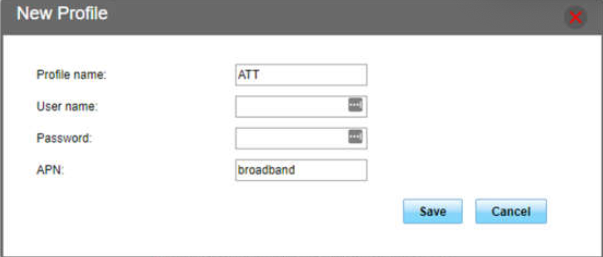
Here you can see the current profile, or add a new one. To use a different APN, add a new profile, naming the profile as desired and then configuring the APN there. Leave the username and password blank, unless you are certain you need it for this SIM. Specifically, if your fixing a modem to work with AT&T instead of T-Mobile, set the APN to be "broadband":

Step 4: Configure the Subnet
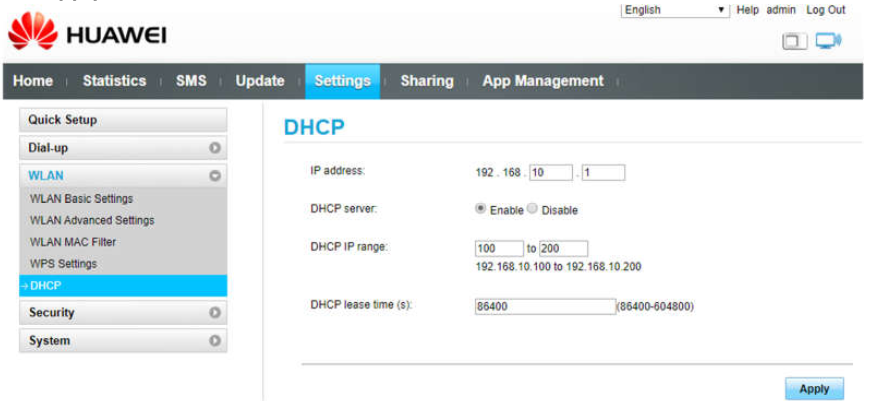
If instead what you need to change or correct is the subnet used, go to the top menu Settings, then to WLAN and DHCP. Here you can change the subnet from 192.168.8.x to anything you want, changing the second octet (the ".8" part). For instance, on a factory reset modem you might need to change it back to 192.168.10.x instead of 192.168.8.x to avoid an IP conflict with your other modem:

Once complete, save all your settings and let the modem reboot. You can verify the modem operates on your laptop if desired, then try it again in your LiveU Solo.
Comments
0 comments
Article is closed for comments.