The Netgear Nighthawk is a Mi-Fi with a LAN port. It has a web user interface you can log into in order to configure key items about the Mi-Fi such as subnet to use or APN. However, in almost all cases with the Netgear Nighthawk the defaults used here are ok and do not need to be changed.
The setting that may need to be changed is to enable the LAN port for connectivity, instead of it being used for "Data Offloading". If the port is used for Data Offloading it won't work with LiveU Solo.
Step 1: Connecting to the Nighthawk
Using your laptop, you can connect to the Nighthawk one of two ways: via its USB cable, or via Wi-Fi. The unit does not make the web user interface available over the LAN connection. If you are using the USB cable, its as simple as plugging the cable into your laptop.
If you are using wifi, use the top button to cause the front screen of the unit to display the SSID and password to join its Wi-Fi. Once connected via either method, open your browser and go to one of the following addresses below.
If you have an AT&T branded device:
If your device only says Netgear:
or
If that address does not work, try turning off or disconnecting other connections already on your laptop, like LAN or Wi-Fi, so that the connection to the Nighthawk its the only working connection.
Once you see the AT&T or Netgear login screen, login using the username "admin" and one of the possible passwords below.
primary:
"attadmin".
If the combination of "admin" and "attadmin" does not work, it may have been changed to "admin" and "liveu123" for the password.
Step 2: Changing the Data Offloading setting
Once logged in, click Settings in the top menu, then go to Setup. Under Setup, you will see an option for Data Offloading. Remember, this must be off to use he LAN port. Make sure the checkbox next to "Enable" is not checked, or uncheck it, then save the changes.
Once the Mi-Fi reboots these settings should take effect!
Changing The Roaming and APN Settings
If you are instructed by LiveU to change the APN or Roaming settings on a nighthawk, follow Step 1 above to access the web interface of the unit.
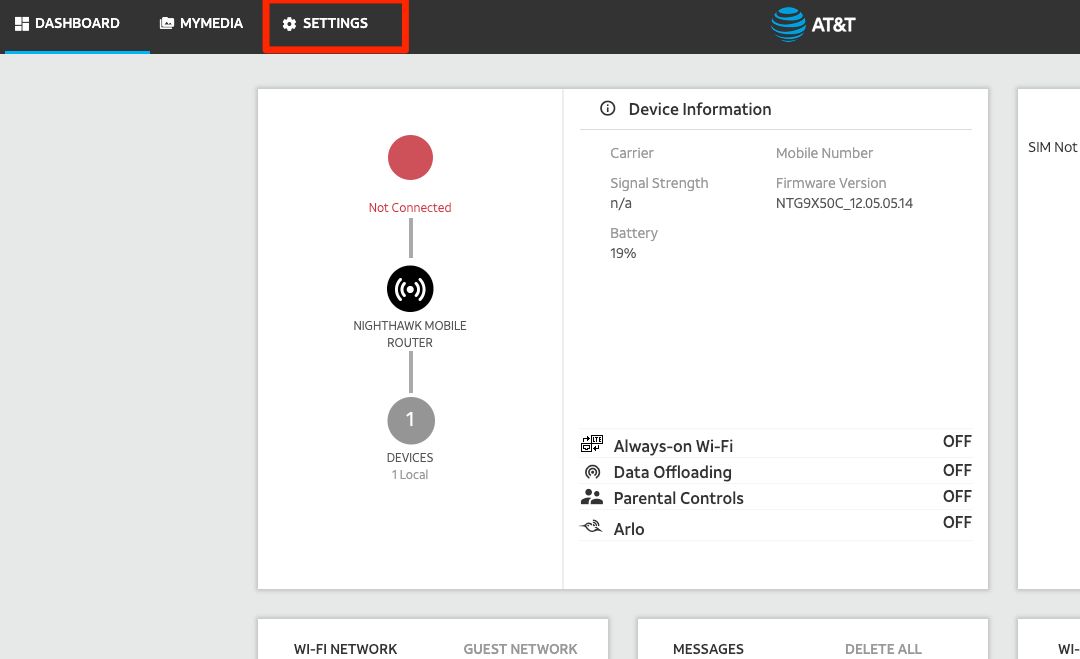
Once there, go to settings, along the top bar: 
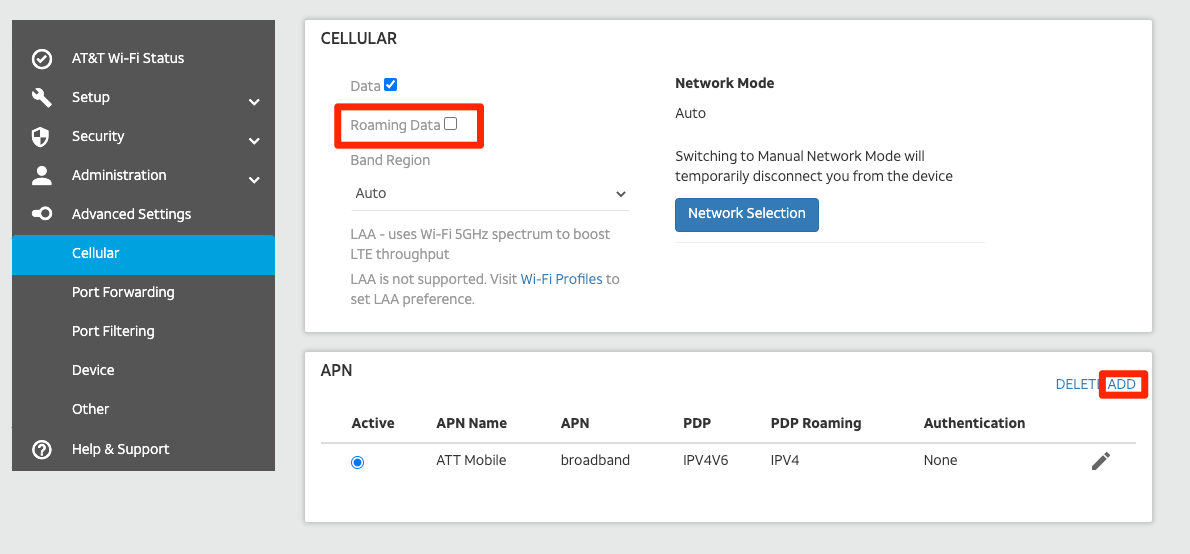
And then on the left hand bar, select Advanced Settings, and Cellular:

Here, turn on Roaming Data be selecting the box. You can either edit the existing APN or add a new one, with the ADD button.
If adding a new one or editing, select the following values:
- For APN Name, if adding a new APN, use "Webbing" or a name of your choice
- For APN, enter either "wbdata" or "fast.t-mobile.com" as instructed by LiveU Support
- For PDP, select IPV4
- For PDP Roaming, select IPV4
- Select None for Authentication
- Leave the username and password fields blank
Once you save the changes make sure whichever APN you selected is the one marked "Active" once back on the Cellular screen.
Reboot the router.
Comments
0 comments
Article is closed for comments.